


Painting the Perfect Room
Time: 2015-07-03 10:21:16 Source: Quartz Stone Display
An open wall sits before you, just begging for a little color. Your hands are itching to grab a paintbrush and get started. As tempting as it may be to get the job done quickly, taking your time is exactly how the project will turn out the way you want it to. Rush through painting, and odds are you will have a lot of touch-up work and unnecessary cleaning afterward.Following this advice will give you a room that looks like a professional did the job.
1. Know Your Paint
Giving a room a makeover is not as simple as walking into a paint store and picking out a color of any old gallon. There are different finishes that provide certain advantages. Consider:
Flat: Ideal for ceilings and bedrooms as well as walls that have imperfections. Easy to touch up, hard to clean.
Eggshell: Provides a low-sheen finish but is not ideal for high-traffic areas because it can get tainted quickly. Also easy to touch up and has a washable finish.
Satin: Has a silky sheen that works well on woodwork and in high-traffic areas, the kitchen and bathrooms. Very easy to clean but can be difficult to touch up.
Semi-gloss: Best for moldings and trim, but may be used in areas with high humidity, such as the kitchen. Easy to clean but, like satin, is hard to touch up.
Gloss: Steer clear of gloss paint for walls, because its finish will show any imperfection. This is best reserved for trim work.
You also have a choice of oil-based or water-based (latex) paint. Latex dries quickly and is easy to work with, but oil-based paint is durable. Generally, people use latex on walls and oil-based paints on trim.
If you aren’t sure which finish may be best, ask a painting contractor. Once you select your paint, ask which brushes and rollers will work best with it. These tools have varying fibers that are ideal for certain walls and paint finishes. For example, natural brushes work well with oil-based paint, and synthetic brushes work best with latex or water-based paint.
2. Be Prepared
Put together all your supplies before you ever open that can of paint. The necessary items include paint, brushes, rollers, tape, drop cloths, and a screwdriver for removing fixtures. It is also handy to have some clean towels and a jar of water in the room, which can help you quickly wipe up any spill.
3. Clear the Room
If you want to do the job like a pro, you will need to prep the room the way a professional does. That means taking all the items off the walls, such as outlet covers, light switch covers, pictures, sconces and anything else that could get in your way.
You should also move all the furniture either out of the room or to the middle of the room, giving yourself ample room to move freely. A good rule of thumb is to be able to stand between the wall and a piece of furniture with your arms extended, one hand on the wall and one on the furniture.
4. Tape and Cover
While many professional painters may not even tape because they are just that good, chances are you have not spent your career perfecting your brush stroke. Therefore, tape, tape, tape. Make sure to get quality painter’s tape and use it along windowsills, baseboards, wainscoting, door frames, ceiling moldings, or any other feature in the room that you need to protect.
If you have left anything in the room, cover it with a drop cloth, plastic or old sheets. It may seem as though the items in the middle of the room are out of harm’s way, but paint splatters can show up where you least expect them. It is better to cover it up now than have to do some hard scrubbing later.
5. Make Any Repairs
Thoroughly inspect the walls. Do you see any rough patches? Any nail holes? Flaking old paint? The best paint jobs are the ones done on a clean, smooth surface. Plaster and patch damaged areas and sand away other rough spots. Wait to paint until these areas are dry.
6. Get Started
You are finally ready to start painting. Start with doing trimming the frame of the room. Use a brush that is 2 to 3 inches wide with a straight edge along your doors and window frames as well as in the corners and along the ceiling. If you have a lot of detailed areas or obstructions, be sure to have a sash brush, which is roughly 1½ inches wide and has an angle, which makes it ideal for cutting in around complex areas.
To prevent getting too much paint on your brush and risking drips, dip the bristles just a third of the way in to the bucket and pull the brush back against the rim of the paint bucket. Use long, smooth brush strokes on the wall, which will prevent streaking.
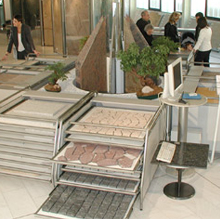
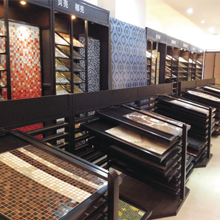
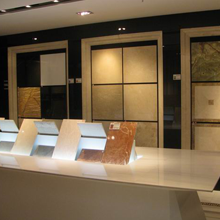
�ؼ���:Stone Display rack Quartz Display Rack
�������:
Company Profile
Advantages of Stone Sample Box
The daily maintenance of the natural stone requires attention.
Furniture is Worth Fixing
How to Reduce Your Trash
Painting the Perfect Room
5 Kitchen Flooring Trends You Should Know About
Choosing Green: Bathroom Remodels
The 5 Most Useful Kitchen Additions
3 Iconic Home Designs
How to Paint a Fiberglass Door
Cover Your Walls—Without Painting


